PSD File Requirements
- Document color needs to be RGB.
- Document color depth needs to be 8 bits/channel.
- Document width and height needs to be 3000 pixels minimum. Document aspect ratio can be anything. Portrait, landscape or square formats are all supported, as long as the width and height are at least 3000 pixels.
- Documents width and height can be maximal 30,000 pixels. We automatically down-scale your design for multiple resolutions, so always upload the high quality PSD you have.
- Texts should always be left aligned
Compatibility
- Only these blend-modes can be used:
- Normal, Multiply, Screen, Overlay, Darken, Lighten, Color Dodge, Color Burn, Hard Light, Soft Light, Difference, Exclusion, Hue, Saturation, Color, Luminosity.
- The following needs to be rasterized before uploading your PSD:
- Layer styles: Right-click the object and choose 'Rasterize Layer Style'.
- Layer mask: Right-click the object and choose 'Convert to Smart Object'.
- Adjustment layers: Merge it with other layers, make the layer invisible or remove the adjustment layer.
- Clipping masks: Select clipping mask and the layer underneath it, then right-click and choose 'Merge Layers'.
- Vector masks: Right-click the object and choose 'Convert to Smart Object'.
Creating a Design
Each top-level layer or top-level layer-group in your PSD file will be an individual object in the Photovisi Tool. The ordering of layers and layer-groups is exactly like in Photoshop; what you see is in Photoshop is what you will see in the Photovisi Tool. There are six different objects that can be made: Shapes, Backgrounds, Photo Viewports, Photo Borders, Effects and Texts.
Click here to download tutorial1.psd (62MB) which will be used when explaining each of the object types below.
Click here to see the result of the tutorial1.psd conversion to the Photovisi Tool.
Shapes
Shapes are objects in your design that are pre-positioned for the user and that can be dragged around by the user or resized. Shapes can be created by making a top-level layer or creating a top-level layer-group. In case of a layer-group, all layers of layer-groups within that to-level layer group will be part of that single top-level shape.
Shapes that are not locked in your PSD will also appear in the extra shapes menu in the Photovisi Tool, so that the user can add more copies of that shape to her design.
If you look at tutorial1.psd you will see a layer-group called Material strips containing two layers. If you look in the Photovisi Tool you will see it is treated as one single shape. Layers such as Vintage flower are also a single shape in the Photovisi Tool, but are made up of just a single layer.
Layers (a.k.a Locked Shapes)
Locked shapes can also be used for example to create a top layer in your design that has a blend mode and a slight color wash. This can add a bit of extra effect to your design. Note that this layer is locked, otherwise it would be clickable and moveable by the user in the Photovisi Tool, something we want to prevent for a layer like this.
If you look at tutorial1.psd you will see a top layer that is locked called Clouds. If you look in the Photovisi Tool you will see that there is a slight wash over the design with a cloud texture, just like in the PSD design. To make sure Photovisi users will not be able to select and move this layer, we've locked this layer.
Invisible Shapes
Sometimes you want to make extra shapes available to the user, so that she can it it herself via the shapes menu in the Photovisi Tool. But those shapes shouldn't be part of your default design layout. You can accomplish this by making the layer or layer-group of the shape in your PSD invisible. An example of this in tutorial1.psd is the layer called Bow.
Sometimes you want to hide an object from the user completely and don't let our PSD parser parse it at all. This can be done by making any layer or layer-group visible and locked.
Backgrounds
Each design can have zero or more backgrounds. A background is specified by giving a top-level layer the name background. Note that only layers can be backgrounds; layer-groups with the name background will be treated as shapes.
Backgrounds should always be the last/bottom layers in your PSD file.
If you want to give the user the option to try out different backgrounds, you can create multiple layers and called background. Each optional background should be made a hidden layer. The default and visible background in your design is then the only visible background layer.
In tutorial1.psd your will see one visible layer called background at the bottom, this is the default background which will be visible. The other optional background that the user can choose which is hidden, can be found below the default and visible background.
Photo Viewports
Photo viewports are placeholders in your PSD that will be replaced with a photo as chosen by the user in the Photovisi Tool. Photo viewports can be made by creating a layer and calling it viewport. The bitmap in that layer will act as mask for the user's photo. When a photo viewport is made up of a single rectangle, square or ellipse we can automatically detect the rotation for the viewport. If it is a more complex mask, we will not apply any rotation to the user's photo. Sometimes you want this because the border around your photo is rotated too, so putting the user's photo without rotation in it might looks a little strange.
Sometimes you want to change the order in which photos are added in the Photovisi tool. This might be because you want to preserve the current layering of photo viewports, but change the order in which they are added to the Photovisi tool. You can do this by appending a number to your photo, like viewport1, viewport2, etc. Photos will be added in the Photovisi tool starting with the lowest to highest number, but will preserve the PSD layer positions of your photo viewports.
In tutorial1.psd you will see a layer with a red rectangle called viewport. This is a simple rotated rectangle made with the Photoshop Rectangle Tool. If you open tutorial1.psd in the Photovisi Tool and add a photo of your own, you will see your photo appear in the upper left corner just as it was specified in the PSD file.
Photo Borders
If you want to create a border or decoration around or on the user's photo, you can create a layer-group. Then make for example a top layer with the border frame, and one layer below that create the actual layer named viewport, with the shape as placeholder for the user`s photo. The whole layer-group will be visible in the Photovisi Tool as one single object that contains the user's photo.
It's important to note that each photo border can only have 1 viewport placeholder layer within it. But you can use as many normal layers and layer-groups below or above the viewport.
In tutorial1.psd you can see photo borders in action by looking at the layer-groups called Old Photo and Old Photo With Effect.
Effects
Effects are filter that can be applied in realtime in the Photovisi Tool on objects such as Photo Viewports, Photo Borders and Shapes. An effect can be created in your PSD by creating a layer-group, and putting all objects that need the effect applied into that effect layer-group. You choose a specific effect by giving the layer-group that needs to apply the effect a name that is of the following format: effect-vintage, where vintage is the effect that you want applied. See Appendix A: Effects which effects are available.
If you open tutorial1.psd, you will see a layer-group called Old Photo With Effect. This is a Photo Border that has an effect applied onto it's placeholder viewport and thus on the user photo.
Effects can be layered onto other effects. This allows you to mix and match different effects to get the right results. You can do this by creating a layer-group with the effect name, and another layer-group within that group. You can go on to nest as many effects as you like. The lowest level effect layer-group will be applied on objects first, then the one above it, etc.
Please note that it's currently not possible to have blend-modes applied to layers or layer-groups contained within effect layer-groups. Apply the blend-mode on the effect layer-group itself or place the effect layer-group in a normal layer-group; that one can have any blend-mode.
Customizing effect parameters
You can override the default effect parameters creating a layer-group directly within the effect layer-group. You need to give this sub-group layer the name effect-params. Each effect parameter default value can then be overwritten by creating an empty layer within the layer-group effect-params. Each layer within effect-params should have a name that corresponds with the follow format: param_name=param_value. For example when changing the color1 parameter on the duotone effect, you should name your layer color1=#ff0000. For numbers, use a dot (.) to indicate floating points, e.g. 0.95.
All available parameters for each effect can be found in Appendix A: Effects. There you will find two columns: Parameter name in PSD and Parameter name in Photovisi Tool. In your layer name you must use the name as specified in the Parameter name in PSD. Note that you must copy and paste that parameter name exactly, because it is case sensitive.
If you open tutorial1.psd you can see that for the layer-group Old Photo With Effect we applied the vintage effect on the placeholder viewport, and have set the effects tint to #58ADFD and tintalpha to 0.66 to give it a blueish glow, compared to the default that is more greenish.
Text and fonts
It's important that any text you add, should always be left aligned.
When you use text in your PSD, it will be available as user editable text in the Photovisi Tool. Text needs to be a top-level layer; it cannot be contained within a layer-group. We support text color, text size and opacity. Effects on fonts are currently not supported, but will be in the near future. All other PSD transformations on fonts are not visible in the Photovisi Tool.
To make parsing font information from your PSD possible, the kind of fonts you can use in your PSD is restricted to the list below.
If there'a font you want to see supported, please contact us and we'll implement it.
| Font name | Font Download link | |
|---|---|---|
| Hello you there | Arial Regular | |
| Hello you there | Luckiest Guy | Download Luckiest Guy TTF |
| Hello you there | Megrim | Download Megrim TTF |
| Hello you there | Monofett | Download Monofett TTF |
| Hello you there | Monoton | Download Monoton TTF |
| Hello you there | Orbitron | Download Orbitron TTF |
| Hello you there | Patua One | Download Patua One TTF |
| Hello you there | Permanent Marker | Download Permanent Marker TTF |
| Hello you there | Playball | Download Playball TTF |
| Hello you there | Poiret One | Download Poiret One TTF |
| Hello you there | Questrial | Download Questrial TTF |
| Hello you there | Roboto | Download Roboto TTF |
| Hello you there | Rock Salt | Download Rock Salt TTF |
| Hello you there | Sacramento | Download Sacramento TTF |
| Hello you there | Satisfy | Download Satisfy TTF |
| Hello you there | Shadows Into Light | Download Shadows Into Light TTF |
| Hello you there | Wire One | Download Wire One TTF |
| Hello you there | Yellowtail | Download Yellowtail TTF |
| Hello you there | Pacifico | Download Pacifico TTF |
| Hello you there | Architects Daughter | Download Architects Daughter TTF |
| Hello you there | Arizonia | Download Arizonia TTF |
| Hello you there | Audiowide | Download Audiowide TTF |
| Hello you there | Bangers | Download Bangers TTF |
| Hello you there | Bree | Download Bree TTF |
| Hello you there | Candal | Download Candal TTF |
| Hello you there | Changa One | Download Changa One TTF |
| Hello you there | Cinzel | Download Cinzel TTF |
| Hello you there | Akronim | Download Akronim TTF |
| Hello you there | Codystar | Download Codystar TTF |
| Hello you there | Dancing Script | Download Dancing Script TTF |
| Hello you there | Faster One | Download Faster One TTF |
| Hello you there | Fredericka the Great | Download Fredericka the Great TTF |
| Hello you there | Inconsolata | Download Inconsolata TTF |
| Hello you there | Indie Flower | Download Indie Flower TTF |
| Hello you there | Limelight | Download Limelight TTF |
| Hello you there | Lobster | Download Lobster TTF |
| Hello you there | Londrina Outline | Download Londrina Outline TTF |
| Hello you there | Capture it | Download Capture it TTF |
| Hello you there | Dymo | Download Dymo TTF |
| Hello you there | Certto headliner | Download Certto headliner TTF |
| Hello you there | Criticized | Download Criticized TTF |
| Hello you there | Didact gothic | Download Didact gothic TTF |
| Hello you there | Josschrift | Download Josschrift TTF |
| Hello you there | Glimstick | Download Glimstick TTF |
| Hello you there | Violation | Download Violation TTF |
| Hello you there | Inked god | Download Inked god TTF |
| Hello you there | Loki cola | Download Loki cola TTF |
| Hello you there | Lot | Download Lot TTF |
| Hello you there | Nice written | Download Nice written TTF |
| Hello you there | Pincoya black | Download Pincoya black TTF |
| Hello you there | Precious | Download Precious TTF |
| Hello you there | Quadranta | Download Quadranta TTF |
| Hello you there | Earwig | Download Earwig TTF |
| Hello you there | Soulmission | Download Soulmission TTF |
| Hello you there | Verdana Regular | |
| Hello you there | Wiffles | Download Wiffles TTF |
| Hello you there | Serif |
Appendix A: Effects
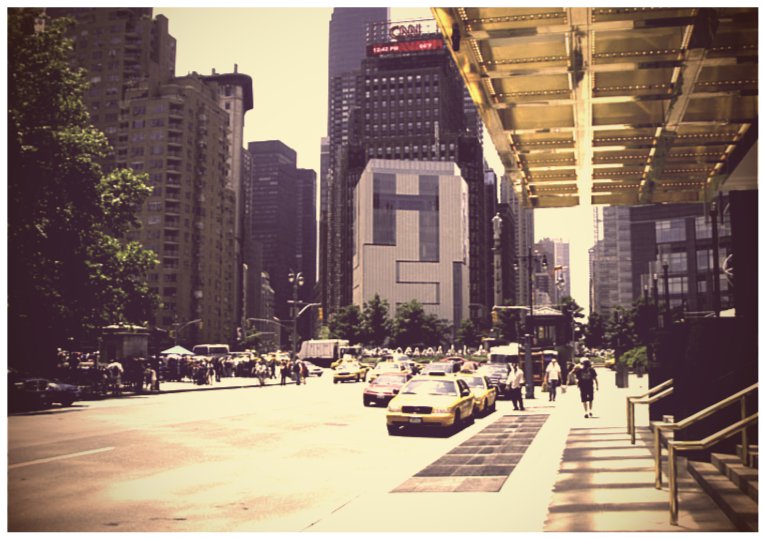
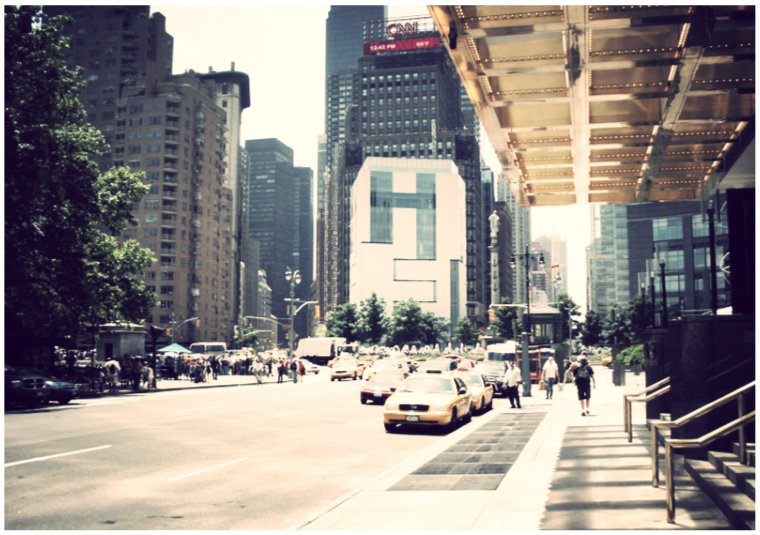
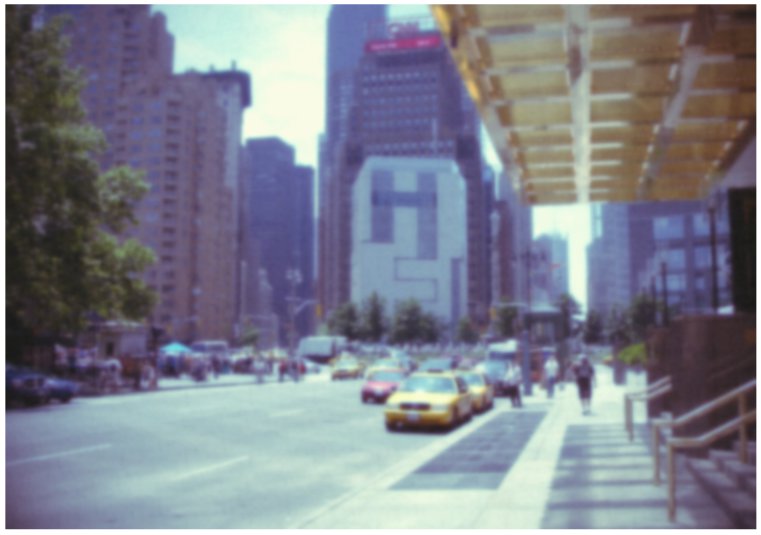
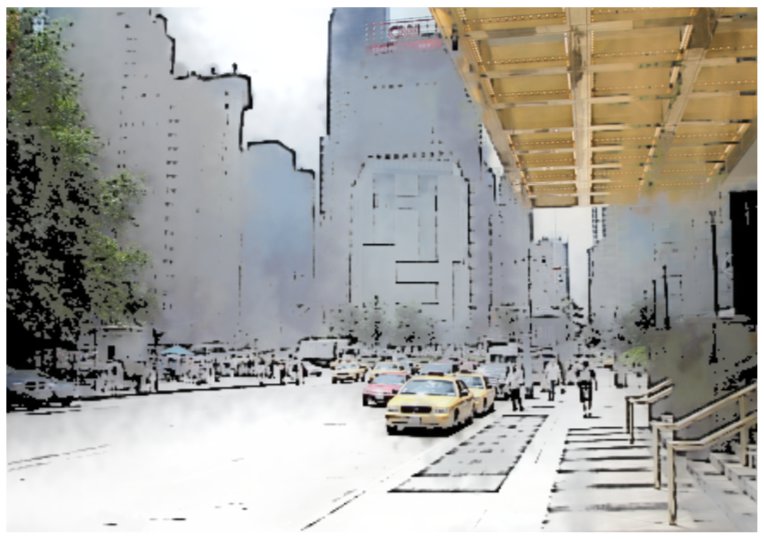
Below is a list of all effects that can be used in your PSD design. You can see the before and after example photo for each effect. To try out the effect in the Photovisi tool click the corresponding link. You can then change the parameters in realtime to fine-tune and match them better with your own PSD design.
Drop shadow
To use this effect, create a layer-group and name it effect-dropshadow and place everything to be effectized in it. Click here to try out this effect in the Photovisi tool.
Customizable parameters for Drop shadow:
| Parameter name in PSD | Parameter name in Photovisi Tool | Default value | Min. value | Max. value |
|---|---|---|---|---|
| color | Color | #303030 | ||
| angle | Angle | 80 | 0 | 360 |
| alpha | Opacity | 0.8 | 0 | 1 |
| blurX | Blur Horizontal | 26 | 0 | 100 |
| blurY | Blur Vertical | 26 | 0 | 100 |
| distance | Distance | 4 | 0 | 80 |
| strength | Strength | 0.6 | 0 | 1.5 |
Highlight
To use this effect, create a layer-group and name it effect-highlight and place everything to be effectized in it. Click here to try out this effect in the Photovisi tool.

Customizable parameters for Highlight:
| Parameter name in PSD | Parameter name in Photovisi Tool | Default value | Min. value | Max. value |
|---|---|---|---|---|
| color | Color | #FF0000 | ||
| alpha | Opacity | 0.9 | 0 | 1 |
| size | Size | 8 | 0 | 100 |
| scale | Scale | 1 | 0 | 360 |
| angle | Angle | 80 | 0 | 360 |
| threshold | Threshold | 128 | 0 | 100 |
| distance | Distance | 1 | 0 | 100 |
| strength | Strength | 1.5 | 0 | 10 |
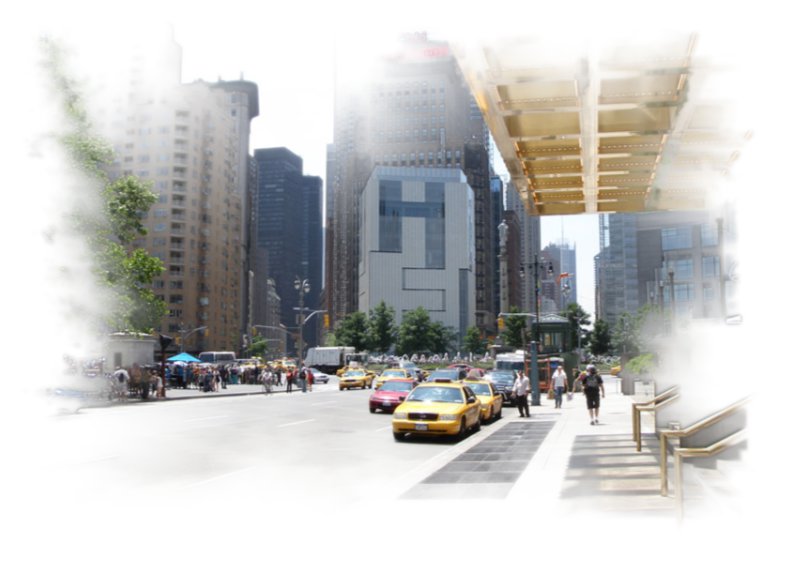
Fading
To use this effect, create a layer-group and name it effect-fading and place everything to be effectized in it. Click here to try out this effect in the Photovisi tool.
Customizable parameters for Fading:
| Parameter name in PSD | Parameter name in Photovisi Tool | Default value | Min. value | Max. value |
|---|---|---|---|---|
| saturation | Saturation | 1 | 0 | 5 |
| blur | Blur | 2 | 0 | 50 |
| blur2 | After Blur | 2 | 0 | 50 |
| contrast | Contrast | 2.4 | 0 | 10 |
| cut | Cut | 0.07 | 0 | 0.95 |
| factor | Factor | 3 | 0 | 10 |
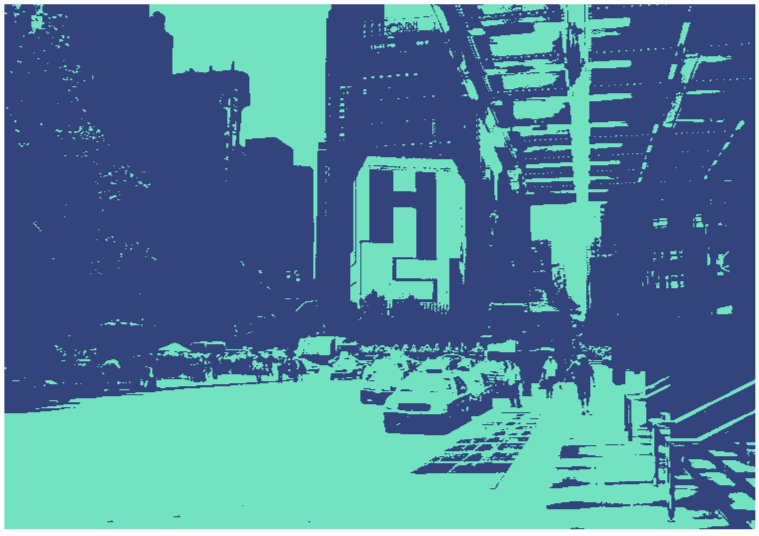
Duotone
To use this effect, create a layer-group and name it effect-duotone and place everything to be effectized in it. Click here to try out this effect in the Photovisi tool.
Customizable parameters for Duotone:
| Parameter name in PSD | Parameter name in Photovisi Tool | Default value | Min. value | Max. value |
|---|---|---|---|---|
| color1 | Foreground Color | #33447C | ||
| color2 | Background Color | #72E2C1 |
Dithering
To use this effect, create a layer-group and name it effect-dithering and place everything to be effectized in it. Click here to try out this effect in the Photovisi tool.
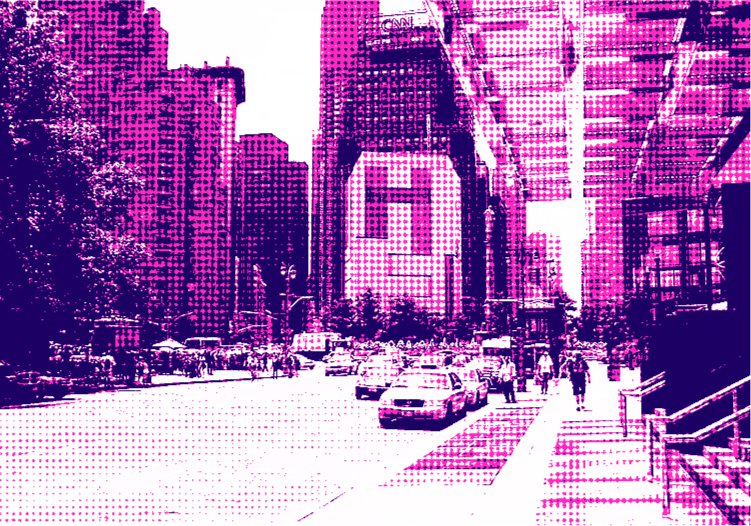
Customizable parameters for Dithering:
| Parameter name in PSD | Parameter name in Photovisi Tool | Default value | Min. value | Max. value |
|---|---|---|---|---|
| color0 | Fill Color | #1c0063 | ||
| color1 | Outline Color | #ff28c1 | ||
| color2 | Background Color | #ffffff | ||
| details | Detail | 0.16425 | 0 | 2 |
| size | Dot Size | 15 | 0 | 50 |
| nuance | Nuance | 0.1 | 0 | 10 |
| strength | Strength | 0.23 | 0 | 2 |
| treshold_x | Treshold Horizontal | 0.5 | 0 | 0.9 |
| treshold_y | Treshold Vertical | 0.78 | 0 | 0.9 |
Line dithering
To use this effect, create a layer-group and name it effect-linedither and place everything to be effectized in it. Click here to try out this effect in the Photovisi tool.
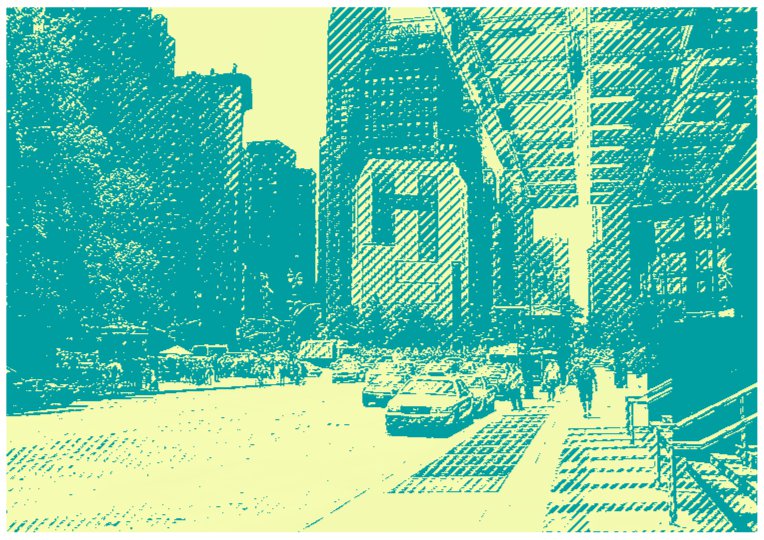
Customizable parameters for Line dithering:
| Parameter name in PSD | Parameter name in Photovisi Tool | Default value | Min. value | Max. value |
|---|---|---|---|---|
| color0 | Foreground Color | #009ea0 | ||
| color1 | Background Color | #ffffb1 | ||
| mode | Draw Style | 1 | 0 | 3 |
| details | Detail | 0.23 | 0 | 0.25 |
| size | Draw Size | 15 | 0.1 | 50 |
| treshold | Fade | 0.66 | 0 | 1 |
| noise | Noise | 0.05 | 0 | 1 |
| strength | Strength | 0.13 | 0 | 1 |
| rotation | Rotation | 45 | 0 | 360 |
| base_x | Horizontal | 0.5 | 0 | 1 |
| base_y | Vertical | 0.5 | 0 | 1 |
Grayscale
To use this effect, create a layer-group and name it effect-grayscale and place everything to be effectized in it. Click here to try out this effect in the Photovisi tool.
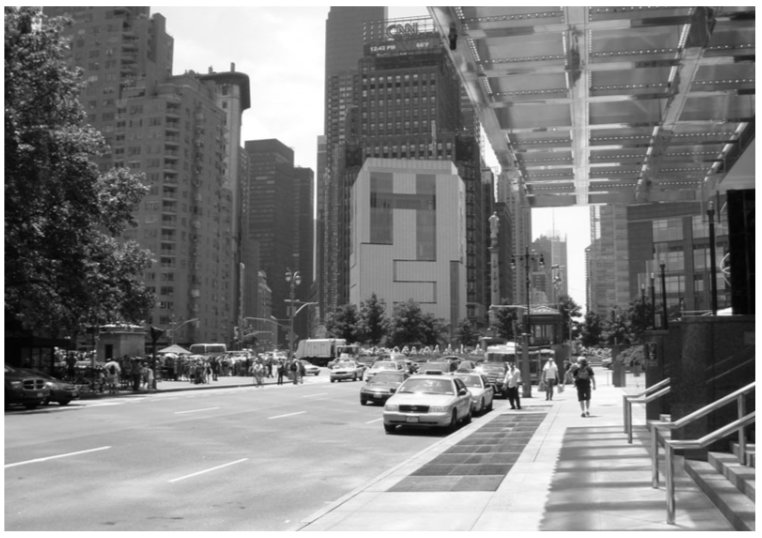
Customizable parameters for Grayscale:
| Parameter name in PSD | Parameter name in Photovisi Tool | Default value | Min. value | Max. value |
|---|---|---|---|---|
| red | Red Strength | 0.3 | 0 | 1 |
| green | Green Strength | 0.59 | 0 | 1 |
| blue | Blue Strength | 0.11 | 0 | 1 |
Pencil stroke
To use this effect, create a layer-group and name it effect-pencilstroke and place everything to be effectized in it. Click here to try out this effect in the Photovisi tool.
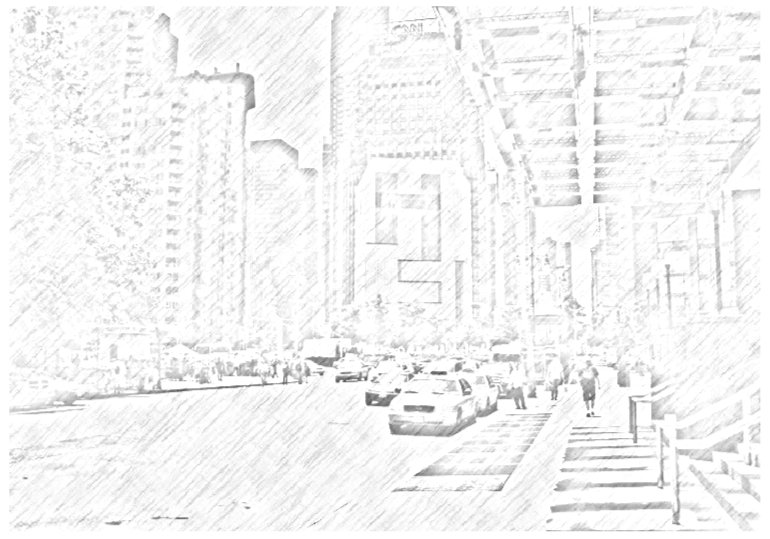
Customizable parameters for Pencil stroke:
| Parameter name in PSD | Parameter name in Photovisi Tool | Default value | Min. value | Max. value |
|---|---|---|---|---|
| fade | Fade | 0.5 | 0 | 1 |
| blur | Strength | 15 | 0 | 20 |
| brightness | Brightness | 67 | 0 | 200 |
| contrast | Contrast | 0.78 | 0.1 | 1 |
| size | Draw Size | 3.3 | 1.5 | 5 |
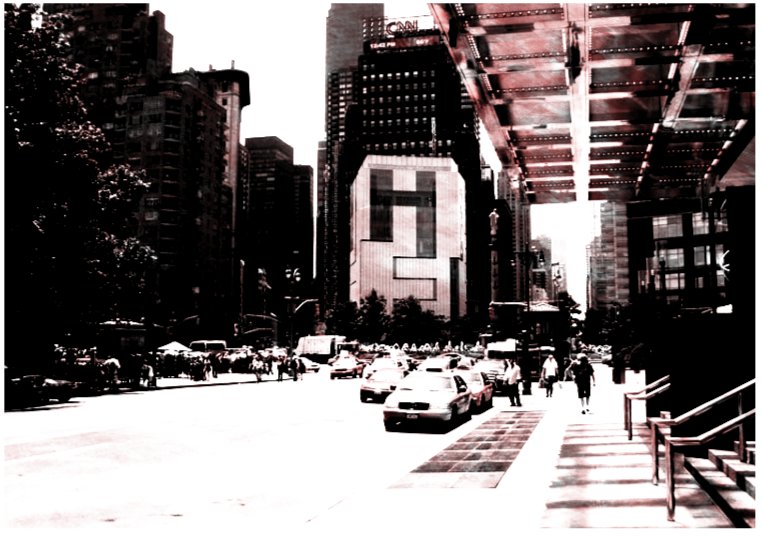
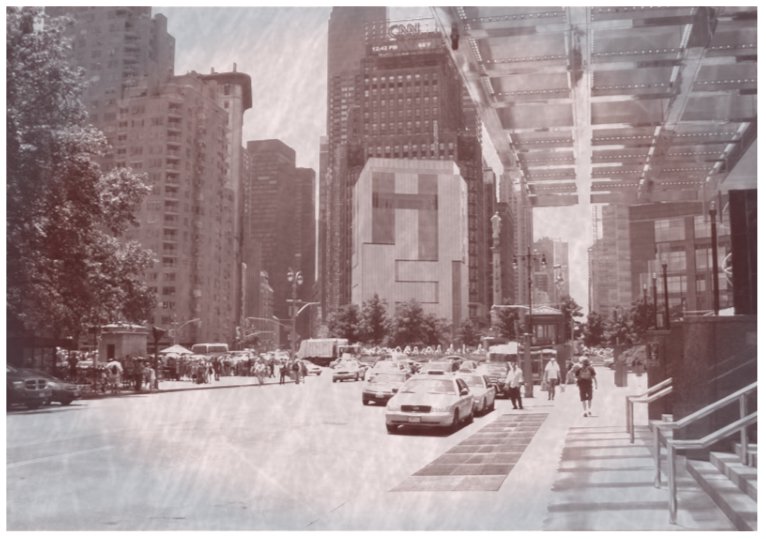
Vintage brown
To use this effect, create a layer-group and name it effect-vintagebrown and place everything to be effectized in it. Click here to try out this effect in the Photovisi tool.
Customizable parameters for Vintage brown:
| Parameter name in PSD | Parameter name in Photovisi Tool | Default value | Min. value | Max. value |
|---|---|---|---|---|
| red | Red Strength | #cc514c | ||
| green | Green Strength | #bcef6b | ||
| blue | Blue Strength | #602d9e | ||
| fade | Fade | 0.25 | 0 | 1 |
| contrast | Contrast | 1.1 | 0 | 2 |
| vignette | Vignette | 1.3 | 0 | 2 |
| gamma | Color Strength | 1.4 | 0 | 4 |
| blur | Blur | 3 | 0 | 175 |
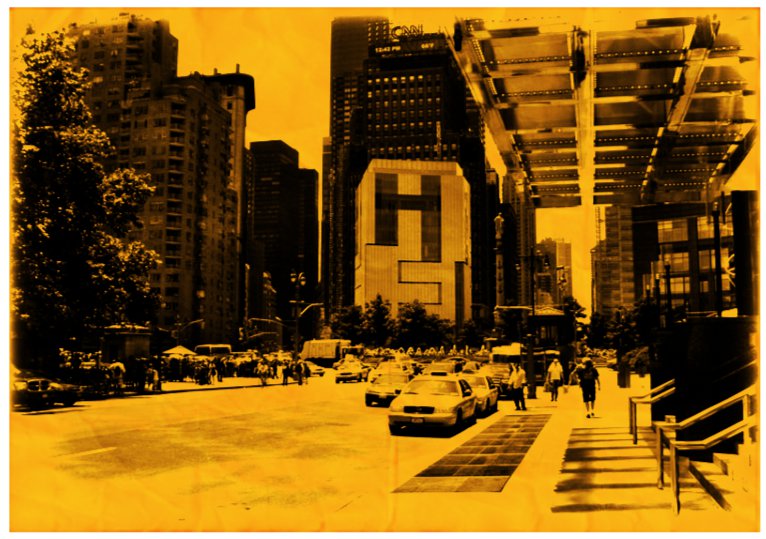
Vintage yellow
To use this effect, create a layer-group and name it effect-vintageyellow and place everything to be effectized in it. Click here to try out this effect in the Photovisi tool.
Customizable parameters for Vintage yellow:
| Parameter name in PSD | Parameter name in Photovisi Tool | Default value | Min. value | Max. value |
|---|---|---|---|---|
| colorcast | Vintage Color | #b200ec | ||
| colorcastalpha | Color Strength | 0.1 | 0 | 1 |
| saturation | Saturation | 0.8 | 0 | 4 |
| fade | Brightness | 0.8 | 0 | 4 |
| contrast | Harshness | -0.066 | -1 | 0.15 |
| vignette | Vignette | 1 | 0 | 5 |
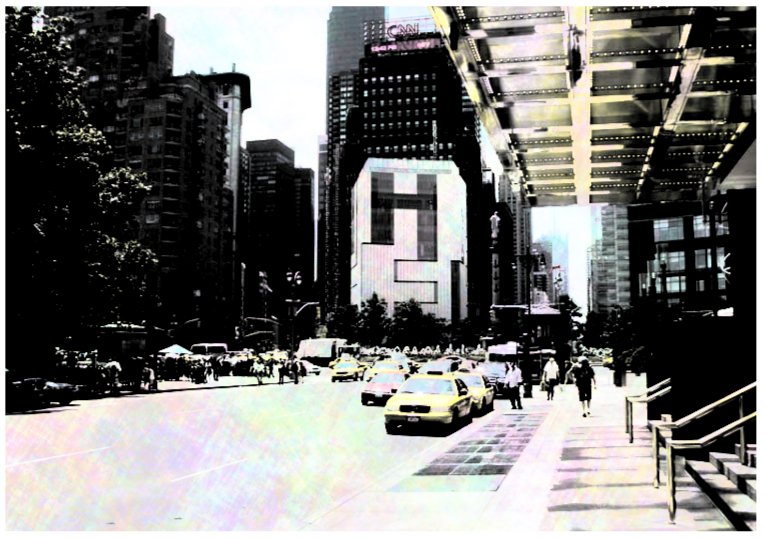
Vintage
To use this effect, create a layer-group and name it effect-vintage and place everything to be effectized in it. Click here to try out this effect in the Photovisi tool.
Customizable parameters for Vintage:
| Parameter name in PSD | Parameter name in Photovisi Tool | Default value | Min. value | Max. value |
|---|---|---|---|---|
| tint | Vintage Color | #EDF29E | ||
| tintalpha | Color Strength | 0.25 | 0 | 1 |
| fade | Vignette | 0.28 | 0 | 1 |
| blur | Blur | 7 | 0 | 175 |
| blur2 | Blur2 | 5.2 | 0 | 200 |
| pattern | Noise | 0.05 | 0 | 0.2 |
Aquarelle
To use this effect, create a layer-group and name it effect-aquarelle and place everything to be effectized in it. Click here to try out this effect in the Photovisi tool.
Customizable parameters for Aquarelle:
| Parameter name in PSD | Parameter name in Photovisi Tool | Default value | Min. value | Max. value |
|---|---|---|---|---|
| patternSize | Draw Size | 48 | 0 | 100 |
| saturation | Color Warmth | 1.25 | 0 | 10 |
| contour | Contour | 1.6 | 0 | 10 |
Color texture
To use this effect, create a layer-group and name it effect-colortexture and place everything to be effectized in it. Click here to try out this effect in the Photovisi tool.
Customizable parameters for Color texture:
| Parameter name in PSD | Parameter name in Photovisi Tool | Default value | Min. value | Max. value |
|---|---|---|---|---|
| bgcolor | Background Color | #FFFFFF | ||
| color1 | Color 1 | #00FFFF | ||
| color2 | Color 2 | #FF00FF | ||
| color3 | Color 3 | #FFFF00 | ||
| color4 | Overall Color | #000000 | ||
| contrast | Contrast | 2.5 | 0 | 10 |
| brightness | Brightness | 0 | -0.9 | 1.3 |
| textureScale | Pattern Size | 2 | 4 | 8 |
| textureAngle | Pattern Angle | 120 | 0 | 360 |
Color texture
To use this effect, create a layer-group and name it effect-colortexture2 and place everything to be effectized in it. Click here to try out this effect in the Photovisi tool.
Customizable parameters for Color texture:
| Parameter name in PSD | Parameter name in Photovisi Tool | Default value | Min. value | Max. value |
|---|---|---|---|---|
| bgcolor | Background Color | #FFFFFF | ||
| color1 | Color 1 | #FF0000 | ||
| color2 | Color 2 | #AA0000 | ||
| color3 | Color 3 | #550000 | ||
| color4 | Overall Color | #000000 | ||
| contrast | Contrast | 2.5 | 0 | 10 |
| brightness | Brightness | 0 | -0.9 | 1.3 |
| textureScale | Pattern Size | 1.8 | -10 | 10 |
| textureAngle | Pattern Angle | 0 | 0 | 360 |
Retro texture
To use this effect, create a layer-group and name it effect-retrotexture and place everything to be effectized in it. Click here to try out this effect in the Photovisi tool.
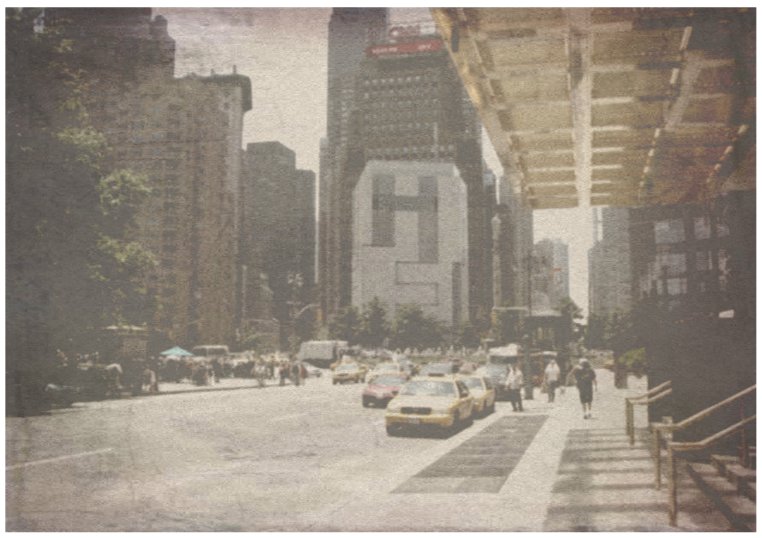
Customizable parameters for Retro texture:
| Parameter name in PSD | Parameter name in Photovisi Tool | Default value | Min. value | Max. value |
|---|---|---|---|---|
| contrast | Contrast | 1.35 | 0 | 10 |
| brightness | Brightness | -0.14 | -1.5 | 1 |
| saturation | Color Warmth | 0.38 | 0 | 3 |
| saturation2 | Color Strength | 1 | 0 | 3 |
| fade | Fade | 0.46 | 0 | 1.5 |
| hue | Overall Color | 360 | 0 | 360 |
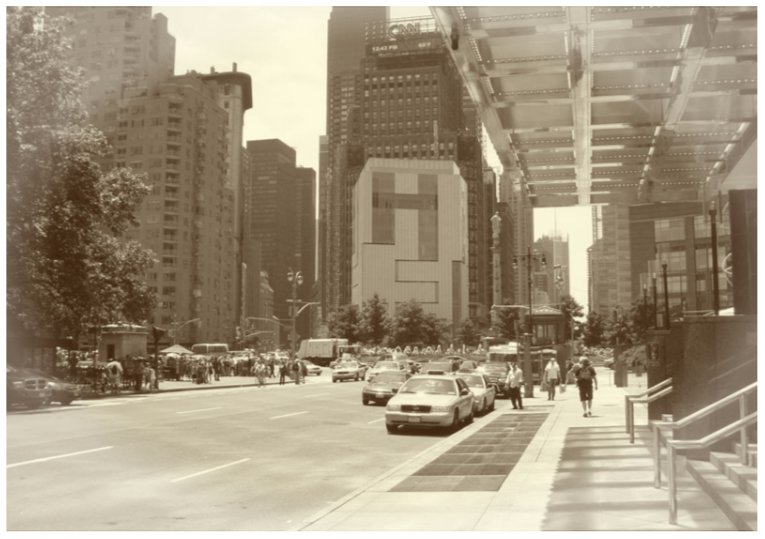
Grainy sepia
To use this effect, create a layer-group and name it effect-grainysepia and place everything to be effectized in it. Click here to try out this effect in the Photovisi tool.
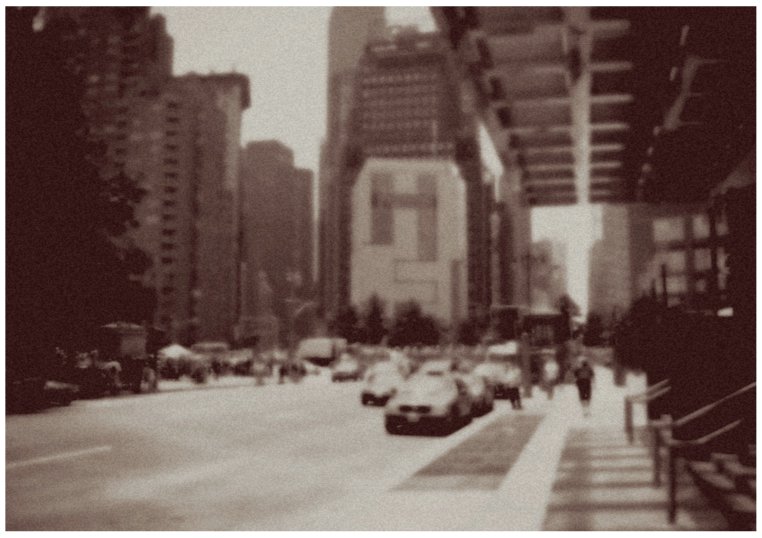
Customizable parameters for Grainy sepia:
| Parameter name in PSD | Parameter name in Photovisi Tool | Default value | Min. value | Max. value |
|---|---|---|---|---|
| blur | Blur | 18 | 0 | 100 |
| noise | Noise | 0.09 | 0 | 1 |
| vignette | Vignette | 0.55 | 0 | 2 |
| vignette2 | Inner Vignette | -0.3 | -1 | 1 |
Separate colors
To use this effect, create a layer-group and name it effect-colorseparation and place everything to be effectized in it. Click here to try out this effect in the Photovisi tool.
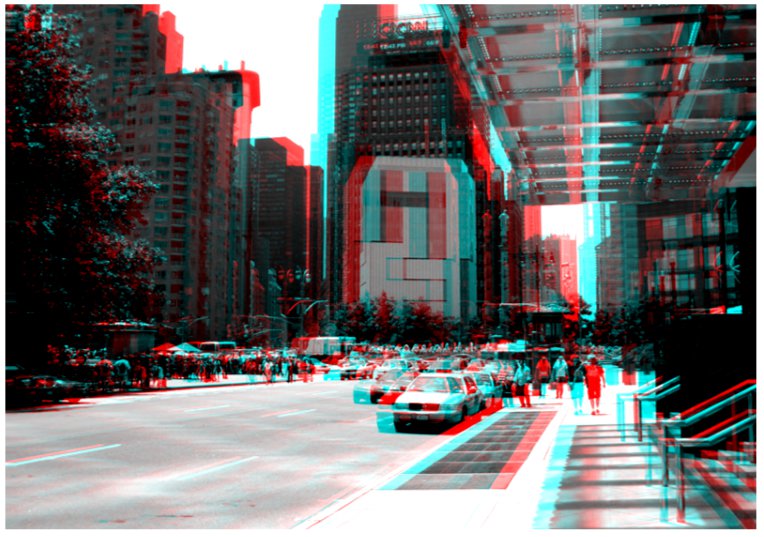
Customizable parameters for Separate colors:
| Parameter name in PSD | Parameter name in Photovisi Tool | Default value | Min. value | Max. value |
|---|---|---|---|---|
| color1 | Color Right | #FF1111 | ||
| color2 | Color Left | #00EDED | ||
| offset1 | Vertical Offset | 20 | 0 | 100 |
| offset2 | Horizontal Offset | 0 | 0 | 100 |
| contrast | Color Strength | 1.35 | 0.5 | 5 |
| brightness | Brightness | -0.35 | -1 | 1 |
Colorize
To use this effect, create a layer-group and name it effect-colorize and place everything to be effectized in it. Click here to try out this effect in the Photovisi tool.
Customizable parameters for Colorize:
| Parameter name in PSD | Parameter name in Photovisi Tool | Default value | Min. value | Max. value |
|---|---|---|---|---|
| color1 | Foreground Color | #012345 | ||
| color2 | Background Color | #FEDCBA | ||
| contrast | Contrast | 1 | -5 | 10 |
| brightness | Brightness | 0 | -0.9 | 0.9 |
| strength | Color Strength | 1 | -10 | 10 |
| red | Red Strength | 0.3 | 0 | 1 |
| green | Green Strength | 0.59 | 0 | 1 |
| blue | Blue Strength | 0.11 | 0 | 1 |
Glow
To use this effect, create a layer-group and name it effect-glow and place everything to be effectized in it. Click here to try out this effect in the Photovisi tool.
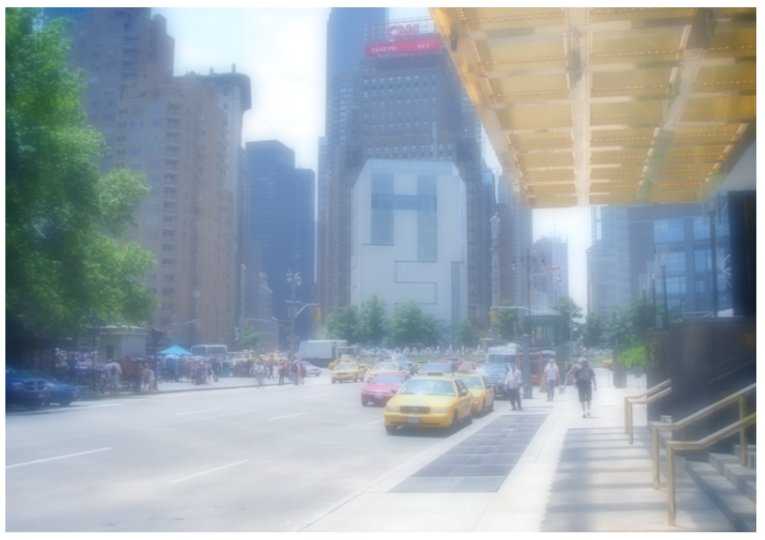
Customizable parameters for Glow:
| Parameter name in PSD | Parameter name in Photovisi Tool | Default value | Min. value | Max. value |
|---|---|---|---|---|
| tint | Glow Color | #738397 | ||
| saturation | Color Warmth | 2 | 0 | 5 |
| fade | Blur | 0.71 | 0 | 1 |
| lighting | Lightning | 0.52 | 0 | 3 |
| blur | Lightning Blur | 32 | 0 | 50 |
Sepia
To use this effect, create a layer-group and name it effect-sepia and place everything to be effectized in it. Click here to try out this effect in the Photovisi tool.
Customizable parameters for Sepia:
| Parameter name in PSD | Parameter name in Photovisi Tool | Default value | Min. value | Max. value |
|---|---|---|---|---|
| tint | Vignette Color | #FFFFFF | ||
| vignette | Vignette Size | 0.3 | 0 | 1 |
| inner | Inner Vignette | 0.6 | 0 | 0.5 |
| outer | Outer Vignette | 0.7 | 0.6 | 1 |
| color1 | Inner Color | #361d07 | ||
| color2 | Inner Color 2 | #fdf9dc | ||
| contrast | Contrast | 1 | 0.1 | 4 |
| brightness | Brightness | 0 | 0 | 1 |
| red | Red Strength | 0.3 | 0 | 1 |
| green | Green Strength | 0.59 | 0 | 1 |
| blue | Blue Strength | 0.11 | 0 | 1 |
| textureStrength | Pattern Size | 0 | 0 | 1 |
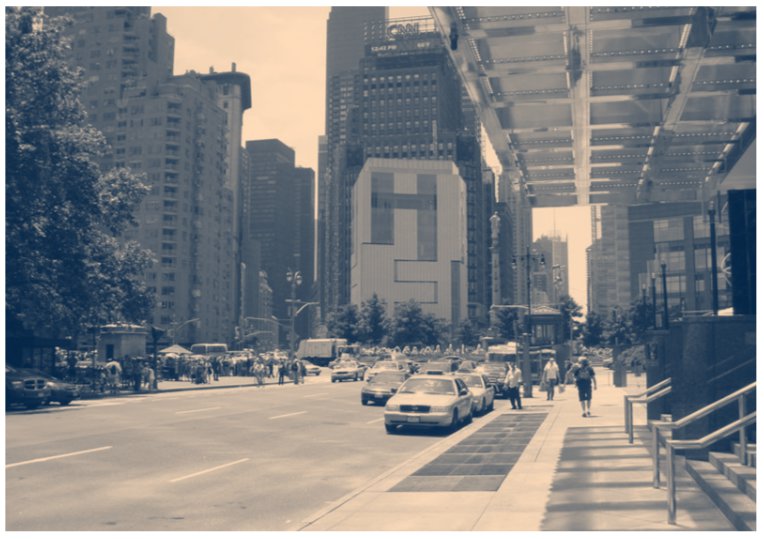
Sepia
To use this effect, create a layer-group and name it effect-sepia2 and place everything to be effectized in it. Click here to try out this effect in the Photovisi tool.
Customizable parameters for Sepia:
| Parameter name in PSD | Parameter name in Photovisi Tool | Default value | Min. value | Max. value |
|---|---|---|---|---|
| tint | Vignette Color | #477F96 | ||
| vignette | Vignette Size | 0.2 | 0 | 1 |
| inner | Inner Vignette | 0.6 | 0 | 1 |
| outer | Outer Vignette | 0.7 | 0 | 1.5 |
| color1 | Inner Color | #390B0B | ||
| color2 | Inner Color 2 | #F5E7E7 | ||
| contrast | Contrast | 1 | 0 | 1 |
| brightness | Brightness | 0.1 | 0 | 1 |
| red | Red Strength | 0.4 | 0 | 1 |
| green | Green Strength | 0.7 | 0 | 1 |
| blue | Blue Strength | 0.11 | 0 | 1 |
| textureStrength | Pattern Size | 0.15 | 0 | 1 |
Xerox
To use this effect, create a layer-group and name it effect-xerox and place everything to be effectized in it. Click here to try out this effect in the Photovisi tool.
Customizable parameters for Xerox:
| Parameter name in PSD | Parameter name in Photovisi Tool | Default value | Min. value | Max. value |
|---|---|---|---|---|
| shade | Paper Color | #F59110 | ||
| contrast | Contrast | 0.6 | 0 | 0.95 |
| vignette | Fading Size | 0.15 | 0 | 1 |
| dark | Brightness | 0.25 | 0.01 | 2 |
| red | Red Strength | 0.3 | 0 | 1 |
| green | Green Strength | 0.59 | 0 | 1 |
| blue | Blue Strength | 0.11 | 0 | 1 |
| textureStrength | Pattern Strength | 0.5 | 0 | 1 |
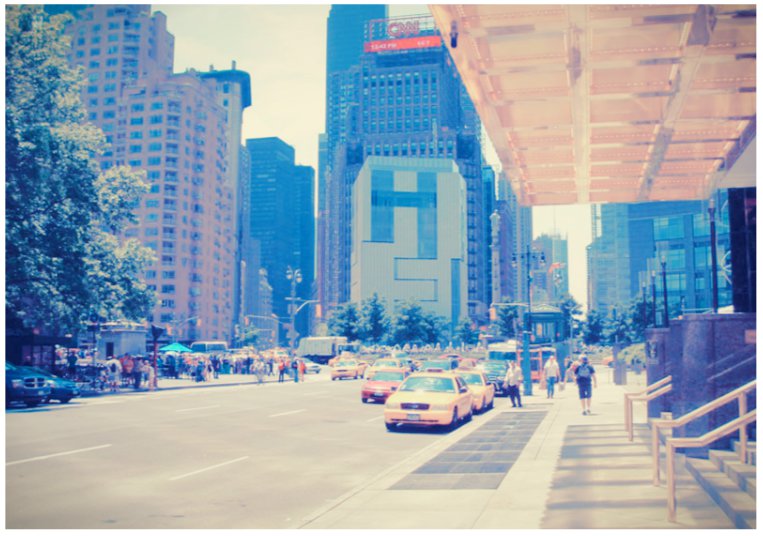
Vintage cold
To use this effect, create a layer-group and name it effect-vintagecold and place everything to be effectized in it. Click here to try out this effect in the Photovisi tool.
Customizable parameters for Vintage cold:
| Parameter name in PSD | Parameter name in Photovisi Tool | Default value | Min. value | Max. value |
|---|---|---|---|---|
| saturation | Color Warmth | 1.5 | 0 | 3 |
| brightness | Brightness | 1 | 0 | 4 |
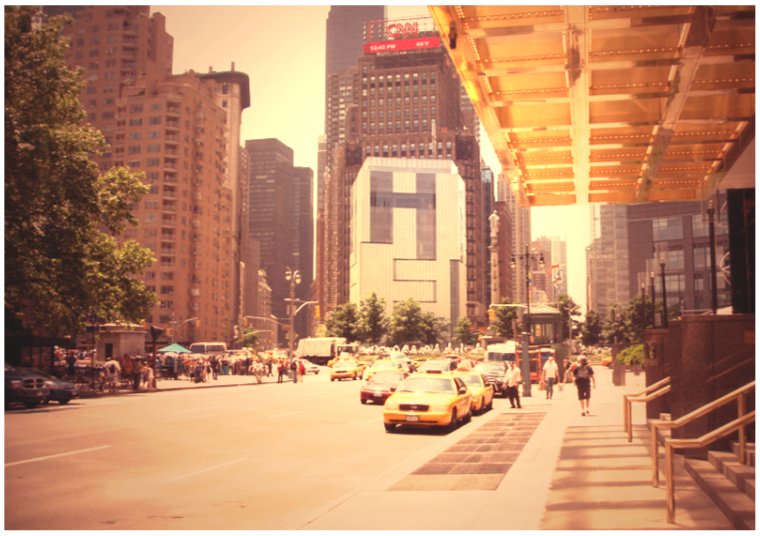
Vintage warm
To use this effect, create a layer-group and name it effect-vintagewarm and place everything to be effectized in it. Click here to try out this effect in the Photovisi tool.
Customizable parameters for Vintage warm:
| Parameter name in PSD | Parameter name in Photovisi Tool | Default value | Min. value | Max. value |
|---|---|---|---|---|
| saturation | Color Warmth | 0.9 | 0 | 3 |
| brightness | Brightness | 0.1 | 0 | 0.9 |
| contrast | Contrast | 1.1 | 0.1 | 4 |
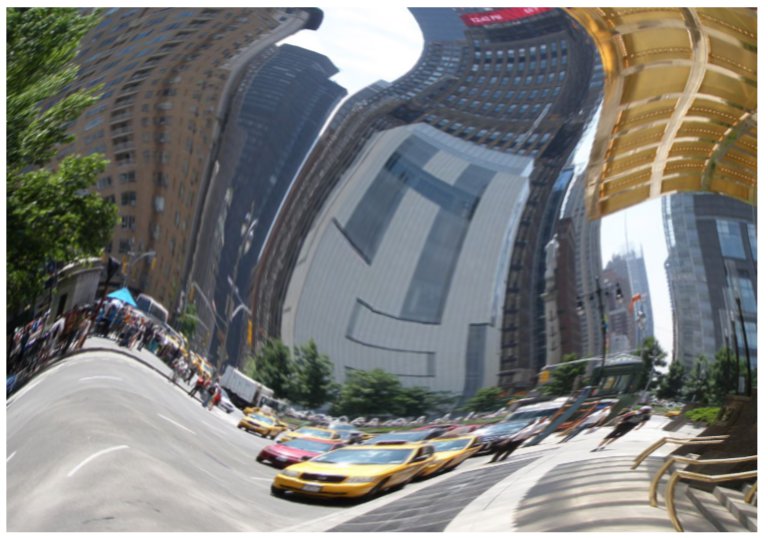
Fun mirror
To use this effect, create a layer-group and name it effect-mirror and place everything to be effectized in it. Click here to try out this effect in the Photovisi tool.
Customizable parameters for Fun mirror:
| Parameter name in PSD | Parameter name in Photovisi Tool | Default value | Min. value | Max. value |
|---|---|---|---|---|
| twirl | Swirl | 0.5 | 0 | 10 |
| spherize | Zoom | 1 | 0.3 | 3 |
| ripple | Ripple | 0.1 | 0 | 0.8 |
| rippleScale | Ripple Strength | 6 | 0 | 20 |